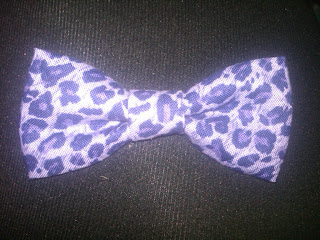
I love making these little clips.
I made these two (pink gingham and b&w polka dots) specifically for a giveaway, but I've made dozens and dozens.


I made these two (pink gingham and b&w polka dots) specifically for a giveaway, but I've made dozens and dozens.
Fabric Hair Bow: Tutorial
 First, let me apologize for the quality of the photos. My camera is has been broken for some time now, so I've been using my phone. Secondly, this is the first photo tutorial, so I hope that it's adequate.
This is a great way to use up fabric scraps to make cute accessories.
You will need:
1. Cut two rectangles from your fabric. The larger one should be twice as long and twice as wide as what you want your finished bow to be, plus a little extra for seam allowance. The second,
smaller piece should be twice the width of the center part of the bow and about two inches long.
2. Fold each piece in half, with the "wrong" side facing out. Sew along the open edge. This will create two tubes. I used orange thread so that it would be easy to see.
3. Turn the tubes inside out, so that the "right" side of the fabric is showing. Fold it so that the seam runs down the center of one side. You can iron the tubes at this point, but I'm lazy when it comes to things like that, so I didn't.
4. Fold the larger tube in half so that the seam is on the inside. Whip stitch the raw edges together. You can either iron it now so that the whip stitched seam is in the center, or do what I did and just kind of flatten it with your hands.
5. Fold and pinch the bow in the center, making it look the way you want, keeping the seam to the back.
6. Run a few stitches through the center, securing the folds.
7. Wrap the smaller tube around the center of the bow. Fold the raw edge over and secure it in the back with a few stitches. Your bow is now done!
8. Attach the clip to the back of the bow, using
either stitches or hot glue.
Variations:
- Layer your fabric with tulle, fishnet, or lace.
- Use less fabric by using pinking shears on the edge of the big tube. You only need to cut a rectangle of fabric twice as long, but the same width as the finished bow.
- Glue or sew a button or decoration to the center. I used Halloween favor rings with the ring part cut off.
- Embellish with embroidery, beads, or sequins.


No comments:
Post a Comment